You are here: Probe and Sample Guide > Sample Preparation > General Sample Mounting Procedures > Small Sample Preparation

Small Sample Preparation

The Dimension Icon ships with several steel sample disks that you may attach to a magnetic sample holder. Also provided with the instrument are red and white colored double-sided adhesive patches, or “sticky tabs,” designed to hold the sample chip to the disk.

Magnetic Steel Disc Selection

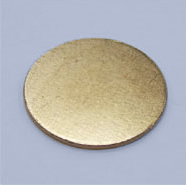
Small samples are usually secured to the stage using magnetic steel discs. A wide variety of small samples may be mounted to these pucks, which easily mount to the stage via the magnetic puck holder. Select a disc that is appropriately sized for the sample.

Part # Description
SD-101 12 mm diameter steel disc
SD-102 15 mm diameter steel disc
SD-104 6 mm diameter steel disc

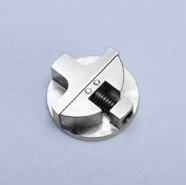
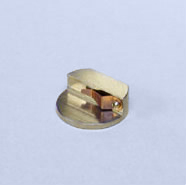
Several cross-sectional sample holders are also available. These are designed to hold a wafer, polymer, or other sample in cross section on the SPM stage:

PSH-103 SD-103 APSH-0040

Sample Mounting Procedure

The following procedure outlines the most common practice for mounting a small sample to a magnetic steel disc.

  1. Peel off a sticky tab from the sheet by lifting one of the red tabs. The adhesive is located underneath the white circle, and with the red tab hanging off to one side.

  1. Place the sticky tab on the steel small sample disc. Press the tab firmly down onto the puck such that the adhesive sticks to the disc.
  2. Gently remove the red-and-white paper by peeling back the end such that the adhesive remains on the surface of the disc.
  3. Using tweezers, place the small sample firmly on the adhesive. Take care not to contact as little of the sample surface as possible, ensuring that you have unaltered regions to image.
NOTE: Alternatively, the sample may be secured to the disc using cyanoacrylate glue (super glue).
CAUTION: Verify that sample is mounted flat and parallel to the XY scan plane. Grossly tilted samples may cause significant movement in the Z actuator for large XY scan sizes. Best results are achieved by ensuring that the sample is flat relative to the XY plane.
  1. Place the mounted sample atop the XY stage (scanning head systems) or scanner (scanning sample systems) by placing the sample on the magnetic small sample holder, and position the magnetic sample holder underneath the Dimension Icon SPM Scanner.
NOTE: The small sample holder provided with the Dimension Icon is not optimal for imaging soft magnetic materials due its the magnetic hold-down properties. If magnetic imaging is intended, use the vacuum chuck.

Related Topics


www.bruker.com Bruker Corporation
www.brukerafmprobes.com 112 Robin Hill Rd.
nanoscaleworld.bruker-axs.com/nanoscaleworld/ Santa Barbara, CA 93117
   
  Customer Support: (800) 873-9750
  Copyright 2010, 2011. All Rights Reserved.